Using OOM on Android Devices
Most of this information can be found in the Open Orienteering Mapper User Manual but it is scattered on multiple pages. I have reorganized the most important information for getting started using OOM on Android and added some of my own preferences based on years of using OOM for drawing and fieldwork on a couple of different devices.
Part 1 - Installation
OOM is not available via the Google Play Store so you need to download it from https://www.openorienteering.org/apps/mapper/. The download button on that site should give you the correct version for your device.
When you download it from this link it will store the file somewhere but not automatically install it. You need to find the file (your browser or notifications should give you a link to it) and open it to install it.
Part 1a - Alternate installation info
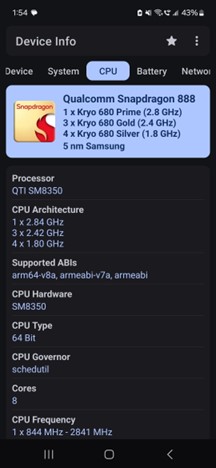
In case the download instructions don’t work for you, you can try downloading a different version of the file from https://github.com/OpenOrienteering/mapper/releases. If you’re not sure which one to use you can download an app such as Device Info and find the CPU information. What you want to know is what ABIs are supported by your device’s hardware. Choose a .apk file from the releases link above that matches one of the ABIs your device supports.
Part 2 - Accessing your maps and files
The first thing to know is that the Android version of OOM does not allow you to create new maps. Nor does it allow you to edit or add new templates (you CAN reorder them and change their opacity). Instead, you need to set up your map with templates on a computer with the Windows, MacOS, or Linux versions of OOM and then copy them onto your Android device.
You have two main options for where to place your files:
- Top-level storage in an OOMapper folder (i.e.Internal storage/OOMapper/)
- On an SD card with the following path: Android/data/org.openorienteering.mapper/files
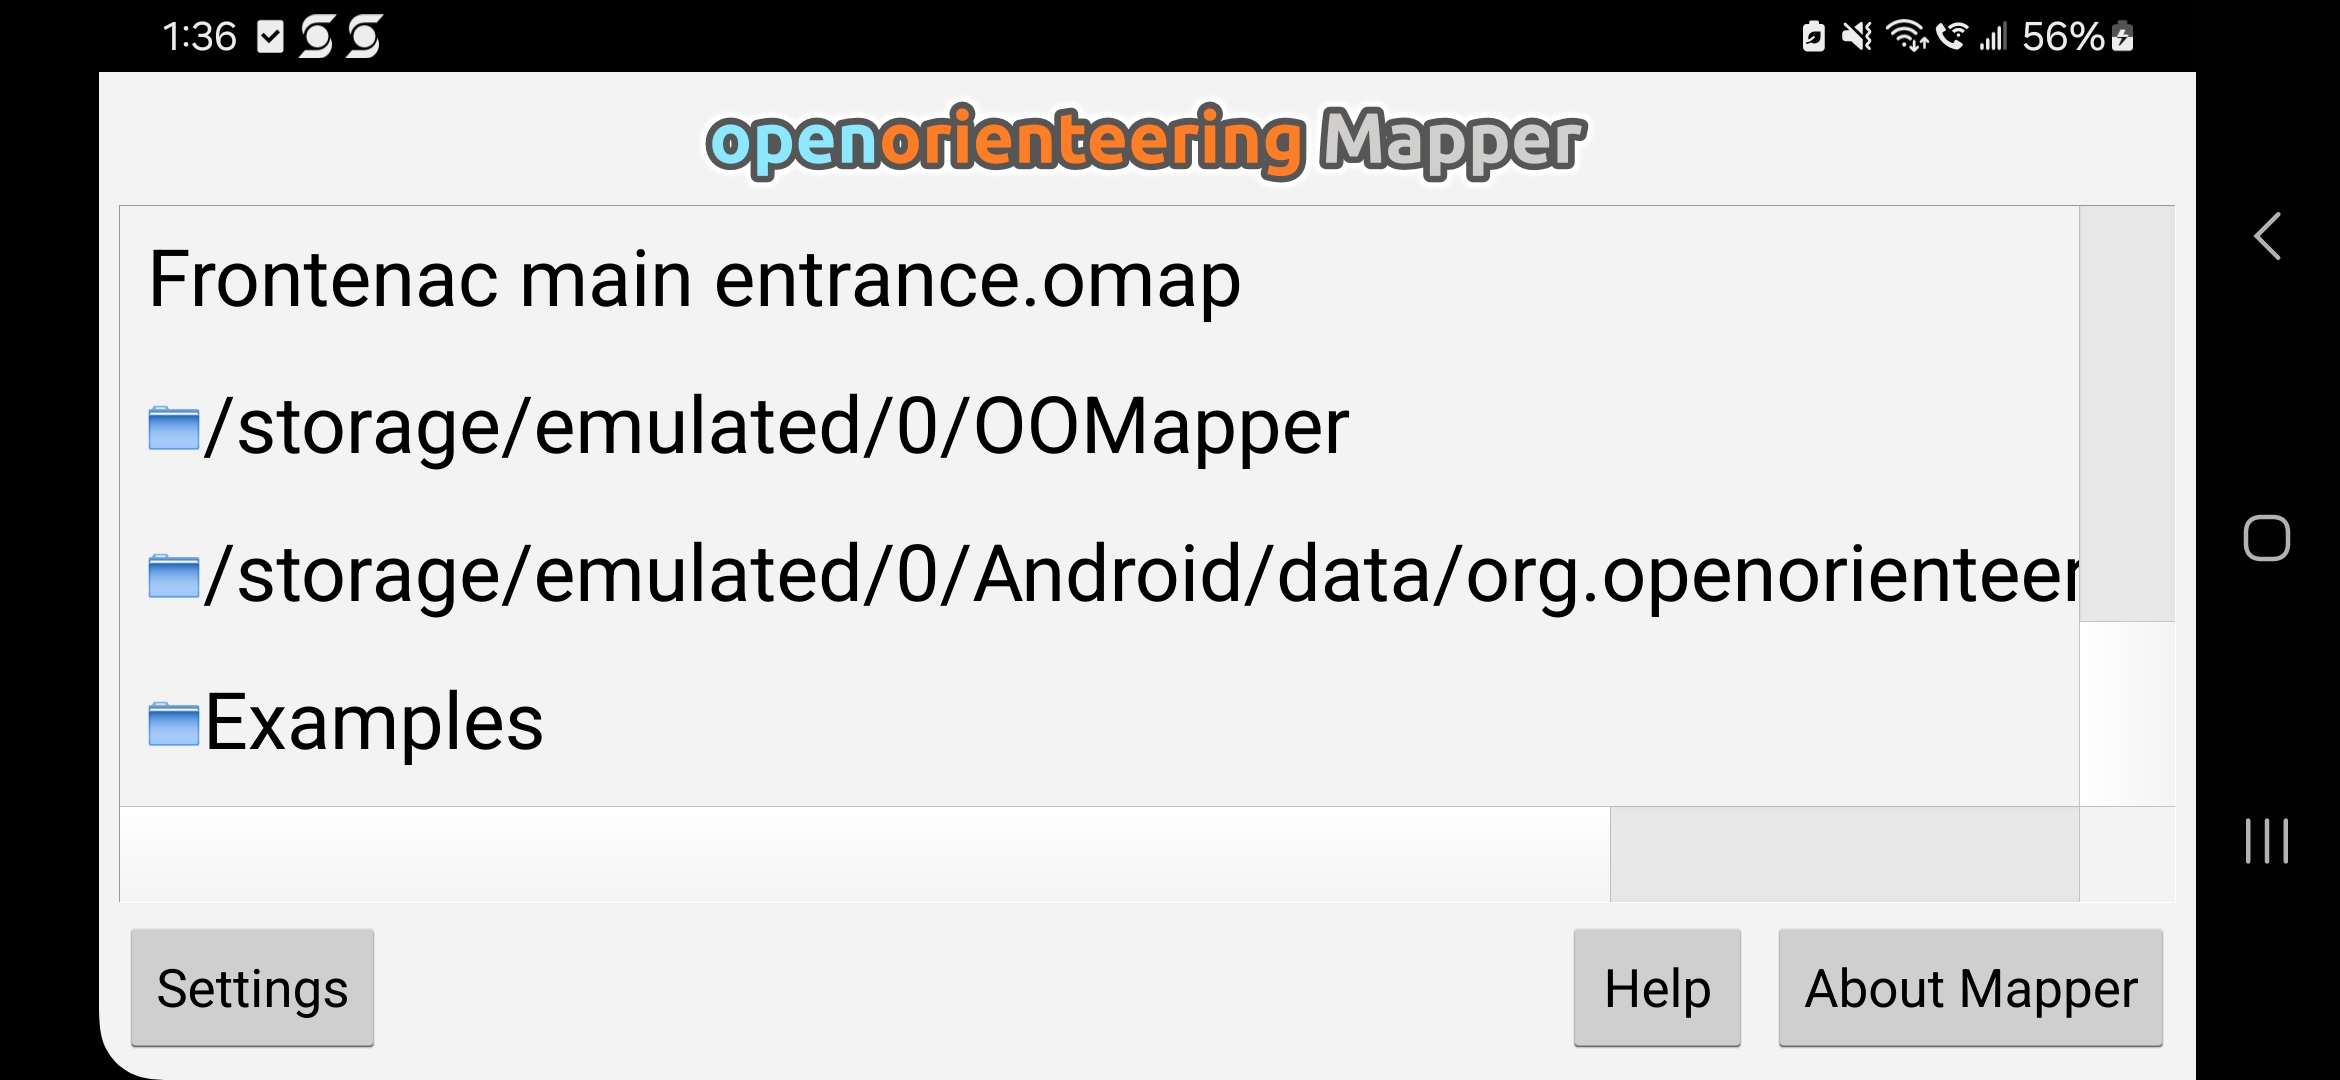
When you open OOM on Android you will get a screen that looks like the following. Note that at least in my case on the version of Android I have on my phone /storage/emulated/0/ represents the ‘Top-level storage’ mentioned in point 1 above so clicking on that will open up that folder and show your files if you store them as point 1 above. The second folder in the second screenshot below is automatically created by OOM and has no files in it but could.
In either case you may need to create the folder if it doesn’t already exist. Some pros and cons of the two locations:
OOMapper folder in top-level storage
Pros
- Is on your device’s hard drive and will be slightly faster to read and write to.
- Is permanently accessible
Cons
- Might have limited space which large projects with large aerial photos and other base material might run up against.
SD card
Pros
- As an SD card, the device is removable so if your device dies you can still access the files.
- You can remove the SD card and use it in your computer and therefore edit the files directly on both devices.
- The amount of storage is limited only by the data size of the SD card.
Cons
- As an external storage device it will be slightly slower to read and write to.
- If you uninstall OOM on your Android device these files will be removed.
- Is only an option if your Android device can take an SD card.
Part 2a - Options for transferring files
If you’re using the SD card option the easiest thing is to pop your SD card out of your Android device and into your computer (assuming both your Android device and computer can take the SD card). Then you can save all your files to your SD card in your computer and transfer then eject the card from there and place it in your Android device. This would have to physically be done every time you want to copy files. In my experience, this can be a pain if you have a case for your Android device that goes over top of the SD card slot.
In my experience, the easiest way to transfer files is to plug your phone or tablet into your computer via USB cable and then you can save/copy your files to your Android device in either the top-level OOMapper or SD card location listed above.
Alternatively, you can use a Bluetooth connection if you have that set up or email files back and forth or use a service like Google Drive or Dropbox. Note that if using email, Google Drive, or Dropbox, you still need to copy them into the right location once you have them on your phone or tablet - they will not by default end up in the right place.
A few additional tips for file management:
- Place your files in project sub-folders and keep them organized with a further subfolder for your templates. It might seem fine at first to store map.oom and template1.oom and template2.oom and template3.jpg, etc. all directly in the OOMapper folder. But once you get into your third project it’s going to be a pain to find the right files and keep them straight!
- At the end of each day of fieldwork on your Android device, copy your main map file and your day’s gpx file back onto your computer. Any further drafting you need to do between days of fieldwork can then be done on your computer and it also provides you with an informal backup system. Make sure to copy your file back to your Android device before your next day of fieldwork. I like to do it immediately when I’m done my drafting so I don’t forget in the morning!
- After you copy your file(s) to your Android device, open them on said device BEFORE leaving home and make sure you do, in fact, have the latest file. It sucks to drive half an hour to the forest and then find out you have an old version of the OOM file.
Part 3 - Using OOM
This article is not about how to do your fieldwork in OOM but here is a few pointers to get you started:
- When using OOM in Android for fieldwork you want to have a good active stylus (do not use a cheap after-market stylus) or you can use a bluetooth mouse on a mousepad strapped to your hip.
- When you start OOM you should turn on the following settings:
- Use the location display icon
 to turn on your GPS when you get to your location. Depending on your device and if you’re using an external GPS it may take a bit of time to dial in to your location.
 - Turn on the compass display

- Turn on the Distance rings

- Once you’re ready to go, turn on the Temporary Trace
 . This makes your GPS track easier to see on the screen and OOM will also show it when you are not showing your template layers.
- Use the location display icon
To see more about the Touch Mode display (what the Android version of OOM shows) you can read about it here.
If you’re looking for more help getting started with fieldwork you can sign up for one of Navigation Sports’ Intro to Fieldwork classes.